Men’s trousers are an essential part of every man’s wardrobe. Whether they are formal trousers, casual pants, chinos, or tailored dress trousers, the quality of their appearance depends on accurate measurements, proper pattern drafting, and excellent fitting.
In garment construction, trouser pattern making is the process of converting body measurements into a paper pattern that serves as a guide for cutting and stitching fabric. A well-drafted pattern ensures that the trousers fit comfortably around the waist, hips, seat, and thighs while providing the correct length and shape.
In this blog, we will explore the essential body measurements, trouser pattern drafting, fitting techniques, common fitting problems, and practical tips for making well-fitted men’s trousers.
Men’s Trouser Pattern Measurement and Fitting: A Complete Guide
Introduction
Men’s trousers are an essential part of every man’s wardrobe. Whether they are formal trousers, casual pants, chinos, or tailored dress trousers, the quality of their appearance depends on accurate measurements, proper pattern drafting, and excellent fitting.
In garment construction, trouser pattern making is the process of converting body measurements into a paper pattern that serves as a guide for cutting and stitching fabric. A well-drafted pattern ensures that the trousers fit comfortably around the waist, hips, seat, and thighs while providing the correct length and shape.
In this blog, we will explore the essential body measurements, trouser pattern drafting, fitting techniques, common fitting problems, and practical tips for making well-fitted men’s trousers.
Understanding Men’s Trouser Pattern Making
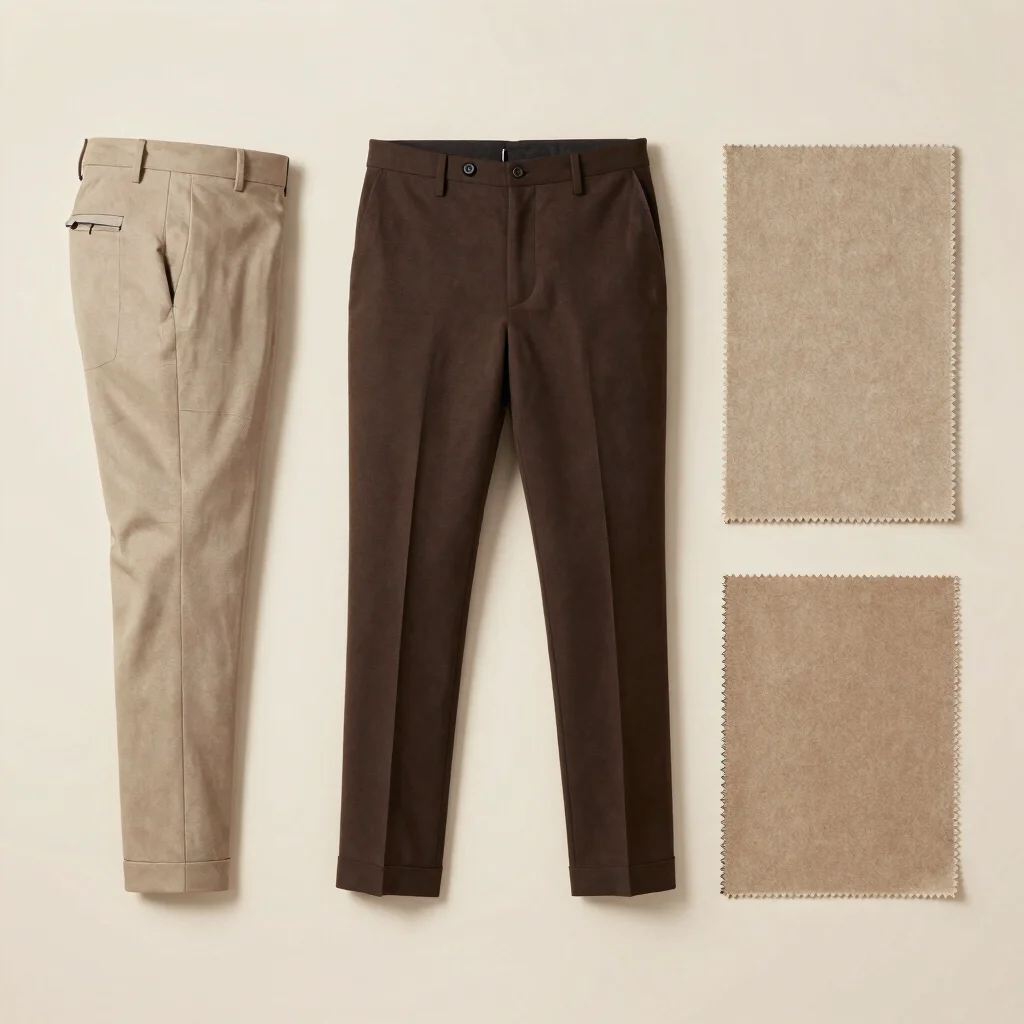
Trouser pattern making involves creating the front and back pattern pieces according to the wearer’s body measurements and the desired trouser style.
A standard pair of men’s trousers generally consists of the following components:
Front leg pattern
Back leg pattern
Waistband
Pocket pieces
Fly extension and fly facing
Belt loops
Other design details, depending on the style
The front and back patterns are especially important because they determine the shape, comfort, balance, and overall fit of the trousers.
Before drafting a pattern, the tailor must understand the wearer’s body shape, preferred fit, and intended trouser style.
Essential Measurements for Men’s Trousers
Accurate body measurements are the foundation of a well-fitting trouser pattern. Measurements should be taken with a flexible measuring tape while the wearer stands naturally.
The measuring tape should remain level around the body without being pulled too tightly or left excessively loose.
A. Waist Measurement
Measure around the natural waist or the position where the wearer wants the trouser waistband to sit.
The tape should be comfortable and level around the body.
Purpose: This measurement determines the waistband size and helps establish the waistline of the trouser pattern.
B. Hip or Seat Measurement
Measure around the fullest part of the hips and buttocks.
Ensure that the tape remains horizontal and passes around the fullest area.
Purpose: This measurement determines the width of the trouser pattern around the seat and hip area.
C. Trouser Length
Measure from the intended waistband position down the side of the body to the desired trouser hem.
The wearer should stand straight while the measurement is taken.
Purpose: This measurement determines the finished side length of the trousers.
D. Inseam Measurement
Measure from the crotch point down the inside of the leg to the desired hem position.
For greater accuracy, compare the measurement with a well-fitting pair of trousers.
Purpose: The inseam determines the inside leg length and helps establish the position of the trouser hem.
E. Crotch Depth
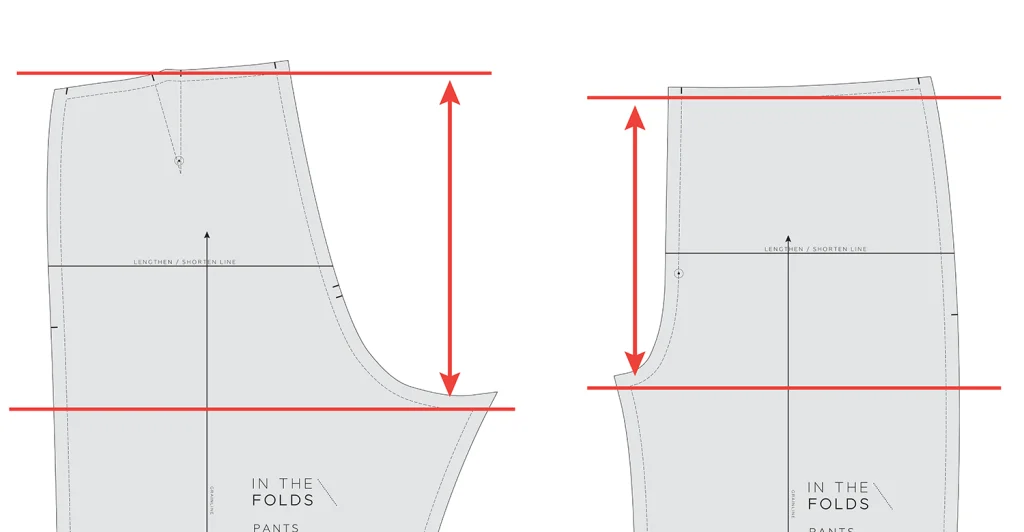
Crotch depth is the vertical distance from the intended waist level to the level of the crotch while the wearer is seated on a firm, level surface.
It may also be estimated using a measuring method or derived from a suitable fitting block.
Purpose: Crotch depth affects sitting comfort, rise, and the way the trousers hang from the waist.
F. Thigh Measurement
Measure around the fullest part of the upper thigh, usually close to the crotch.
Keep the measuring tape comfortable without compressing the thigh.
Purpose: This measurement determines the upper-leg width and helps prevent tightness when walking or sitting.
G. Knee Measurement
Measure around the knee at the desired knee level, with the leg in a natural position.
Purpose: This measurement helps determine the shape and width of the trouser leg around the knee.
H. Bottom or Hem Measurement
Measure the desired circumference of the trouser opening at the bottom.
The measurement depends on the style, such as slim-fit, straight-fit, tapered, or wide-leg trousers.
Purpose: This measurement determines the final leg opening and contributes to the overall silhouette.
I. Front Rise and Back Rise
The front rise extends from the front waistline through the crotch area, while the back rise extends from the back waistline through the seat and crotch area.
These measurements can be checked against a well-fitting garment or established through a fitting block.
Purpose: Front and back rise measurements are essential for comfortable movement and proper coverage around the waist and seat.
Preparing to Draft a Men’s Trouser Pattern
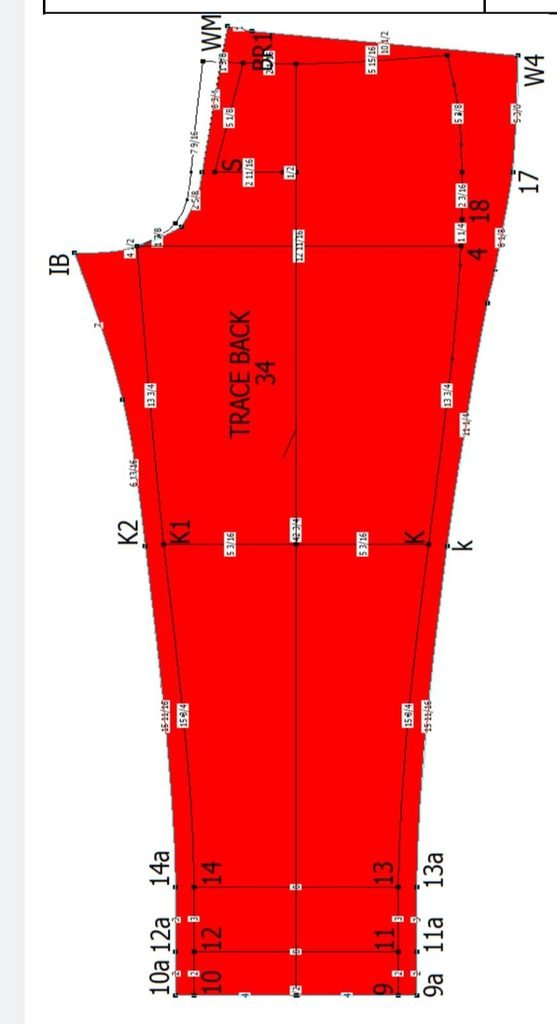
Before drafting the pattern, organize all body measurements and decide on the desired fit.
The following tools are commonly used:
Measuring tape
Pattern paper
Straight ruler
Hip curve or pattern-drafting curve
Set square
Pencil and eraser
Scissors
Body measurement chart
Next, determine the style of the trousers. Formal trousers may require a clean, tailored silhouette, while casual trousers may have a more relaxed shape.
It is important to distinguish between body measurements, pattern ease, and seam allowance.
Body measurement: The actual measurement of the wearer.
Pattern ease: Additional room provided in the pattern for comfort and movement.
Seam allowance: Extra fabric added beyond the stitching line for sewing.
These three elements must be considered separately to achieve an accurate fit.
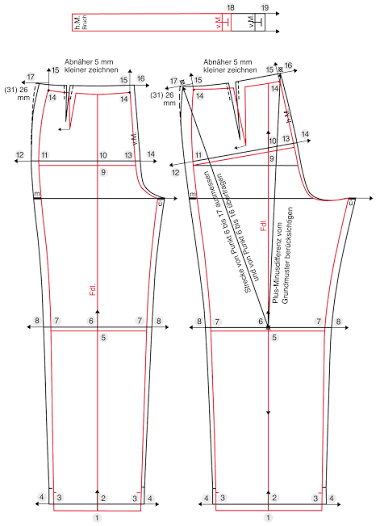
Basic Steps in Men’s Trouser Pattern Drafting
Step 1: Establish the Basic Length
Draw a vertical guideline on the pattern paper to represent the trouser length.
Mark the important horizontal levels, including the waist, hip, crotch, knee, and hem.
The distance between these levels depends on the wearer’s measurements and the selected drafting system.
Step 2: Draft the Front Trouser Block
Begin with the front leg pattern using the waist, hip, crotch depth, thigh, knee, and hem measurements.
Establish the front crotch extension and shape the front crotch curve smoothly.
Draw the side seam and inseam while maintaining a balanced leg shape.
The front waistline may require shaping with darts or other design features, depending on the drafting method and garment style.
Step 3: Draft the Back Trouser Block
The back pattern generally requires additional shaping around the seat and crotch compared with the front pattern.
Use the seat measurement, back rise, and the chosen drafting method to establish the back crotch extension and curve.
Shape the back waistline and side seam to provide sufficient room around the buttocks.
The back pattern must be balanced with the front pattern so that the trousers hang correctly without pulling or twisting.
Step 4: Shape the Knee and Hem
Mark the desired knee width and bottom opening.
Connect the thigh, knee, and hem points with smooth lines along the inseam and side seam.
For straight-fit trousers, the leg width remains relatively consistent below the thigh. For tapered trousers, the leg gradually narrows toward the hem.
For slim-fit trousers, the pattern may be narrower, but sufficient ease must remain for comfortable movement.
Step 5: Add Waistband and Design Details
Draft the waistband according to the intended finished waist measurement and waistband construction.
Add the necessary pattern pieces for pockets, fly construction, belt loops, and other design features.
Check all stitching lines, notches, grainlines, and matching points before cutting the fabric.
Step 6: Add Seam Allowances
Add seam allowances according to the construction method and workshop standards.
Common areas requiring allowances include the side seams, inseams, crotch seams, waistband, and hem.
The exact allowance may vary depending on the fabric, sewing method, and amount of adjustment expected during fitting.
Important: Drafting formulas differ between tailoring systems. Therefore, use one established drafting method consistently rather than combining unrelated formulas.
Understanding Men’s Trouser Fitting
Trouser fitting is the process of checking whether the finished garment matches the wearer’s body shape, measurements, and comfort requirements.
A good fit should allow the wearer to stand, sit, walk, and bend comfortably.
The trousers should also maintain a balanced appearance, with smooth lines and an appropriate leg shape.
The main areas to check are:
A. Waist Fit
The waistband should sit securely at the intended position without digging into the body or slipping down.
If the waistband is too tight, it may cause discomfort and pulling around the waist.
If it is too loose, the trousers may slip down or require excessive belt adjustment.
Correction: Adjust the waist circumference and redistribute any necessary shaping through the center-back seam or other appropriate seams.
B. Hip and Seat Fit
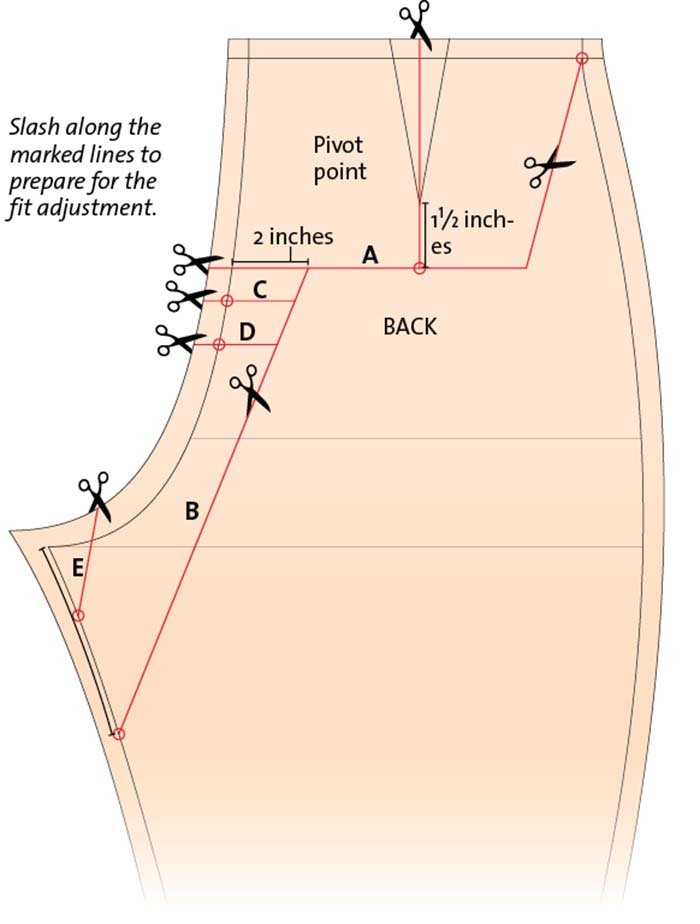
The seat area should provide enough room for sitting and walking.
Excessive tightness may cause horizontal tension lines, pulling around the crotch, or stress at the seams.
Excessive looseness may create folds or a baggy appearance around the buttocks.
Correction: Review the hip and seat measurements, back crotch curve, and available pattern ease. Make small adjustments and test the result before removing substantial width.
C. Crotch Fit
Crotch fitting is one of the most challenging aspects of men’s trouser construction.
If the crotch is too tight or too shallow, the trousers may pull uncomfortably when sitting or walking.
If the crotch is too low, excess fabric may hang between the legs, creating a dropped or sagging appearance.
Correction: Evaluate the front and back rise, crotch extension, and crotch curve. Identify the actual cause of the problem before changing the pattern.
Simply lowering or raising the entire crotch line may not solve every crotch-fitting issue.
D. Thigh Fit
The trousers should provide sufficient room around the thighs for comfortable movement.
If the thighs are too tight, the fabric may pull across the upper legs or restrict walking.
If they are too loose, the trousers may look bulky.
Correction: Adjust the front and back leg widths as needed while preserving the balance of the side seam and inseam.
E. Knee Fit
The knee area affects the overall shape and movement of the trousers.
Excessive tightness may restrict bending, while excessive width can make the trousers appear shapeless.
Correction: Adjust the knee width and blend the changes gradually into the thigh and lower-leg sections.
F. Trouser Length
The finished length should complement the footwear and intended style.
Formal trousers may have a slight break, a clean no-break finish, or another preferred hem treatment.
Casual trousers may be worn with a shorter hem or a rolled finish.
Correction: Check the length while the wearer stands naturally and wears the intended shoes. Confirm the front and back hem positions before cutting away excess fabric.
G. Leg Balance
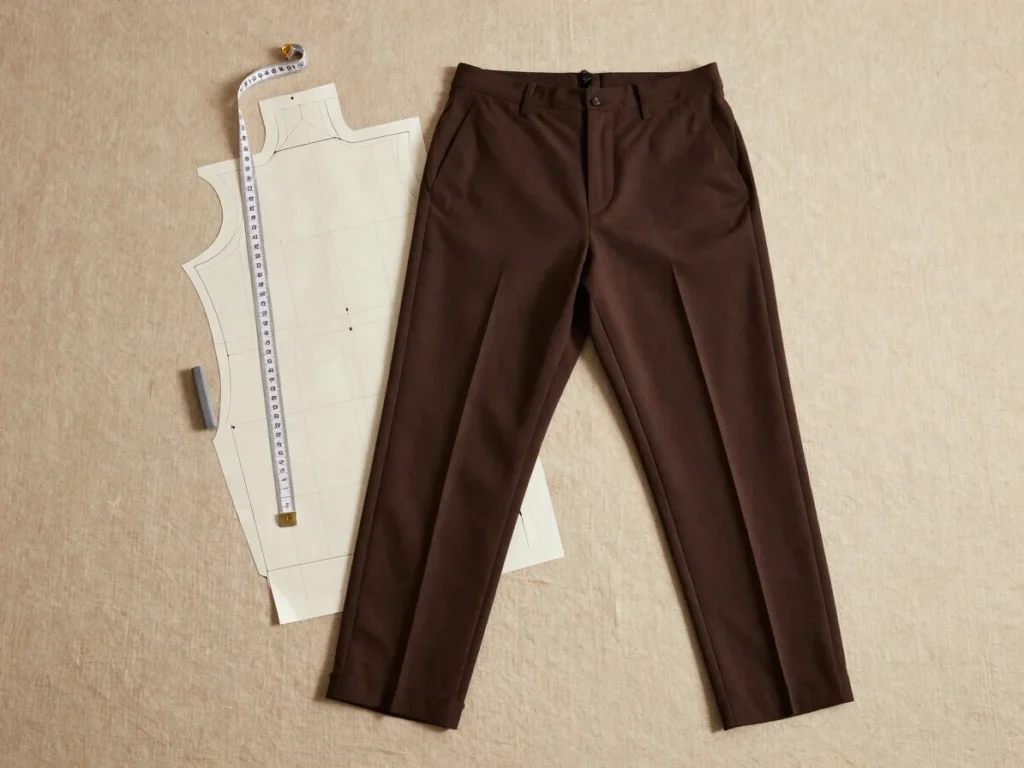
Both trouser legs should hang smoothly without unwanted twisting.
The side seams and inseams should follow the intended lines of the legs.
If the trousers twist or swing toward one side, check the grainline, pattern balance, seam alignment, and the wearer’s posture.
Correction: Inspect the pattern and the garment together. Avoid changing the seam shape without first identifying the source of the imbalance.
Common Men’s Trouser Fitting Problems and Their Solutions
Fitting Problem Possible Cause Suggested Correction
Tight waistband Insufficient waist allowance Increase the waistband and corresponding garment waist as needed
Loose waistband Excess waist width Reduce the waist and redistribute shaping
Tight seat Insufficient seat ease or unsuitable back shape Review the seat measurement and back crotch curve
Sagging crotch Excess crotch depth or unsuitable rise balance Check crotch depth, rise, and pattern balance
Pulling at the crotch Insufficient room or incorrect crotch shape Review crotch extension, rise, and seat ease
Tight thighs Insufficient upper-leg width Add appropriate width to the front and/or back leg
Excess fabric at the knee Incorrect knee width or leg balance Refine the knee shaping and blend the seams
Trouser legs twisting Grainline or balance problem Check the pattern grainline and seam alignment
Uneven hem Incorrect length or leg balance Recheck the side length, inseam, and hem position
Note: These are common causes, not universal diagnoses. Several fitting problems can look similar, so always inspect the garment on the wearer before altering the pattern.
The Importance of a Trial Garment
One of the best ways to achieve an accurate fit is to make a trial garment, often called a toile or muslin.
A trial garment is sewn from inexpensive fabric before cutting the final fabric.
It allows the tailor to assess the pattern’s accuracy and make corrections before final production.
During the fitting session, check the following:
Waistband position and comfort
Hip and seat ease
Front and back rise
Crotch comfort while sitting
Thigh and knee width
Leg shape and balance
Trouser length
Pocket placement and accessibility
Mark any required changes directly on the trial garment or transfer them to the pattern.
After making the corrections, check that the front and back seams still match and that the grainlines remain correctly positioned.
For complicated fit problems, more than one trial fitting may be necessary.
Tips for Achieving a Professional Trouser Fit
Professional results depend on careful measurement, accurate drafting, and systematic fitting.
Consider the following tips:
Take measurements carefully. Measure the wearer in a natural standing position and confirm important measurements before drafting.
Use the correct waist position. Trousers worn at the natural waist require different proportions from low-rise or mid-rise styles.
Allow sufficient movement. Do not draft trousers too tightly simply to achieve a slim silhouette.
Understand the fabric. Stretch fabrics, lightweight materials, and heavy suiting fabrics behave differently during construction and wear.
Check the grainline. Correct grainline placement helps the trousers hang smoothly.
Fit before final stitching. Check the major fit areas before completing the waistband and other finishing details.
Make gradual alterations. Small, controlled adjustments are easier to evaluate than large changes made without testing.
Keep a record of corrections. Documenting successful adjustments helps improve future patterns for the same wearer.
Check the trousers with shoes. The footwear affects how the finished hem appears.
Prioritize comfort and appearance together. A well-fitted trouser should look attractive without restricting normal movement.
9. Conclusion
Men’s trouser pattern measurement and fitting require a combination of accurate body measurements, sound pattern-drafting techniques, and practical garment-fitting skills.
Measurements such as waist, hip, seat, crotch depth, inseam, thigh, knee, and hem width form the foundation of the pattern. However, measurements alone do not guarantee a perfect fit. Pattern ease, body proportions, fabric behavior, and garment balance must also be considered.
By drafting the front and back patterns carefully, checking the crotch and seat shapes, and correcting fitting issues through a trial garment, tailors can achieve trousers that are comfortable, balanced, and professionally finished.
Whether you are a fashion student, an aspiring tailor, or an experienced garment maker, mastering men’s trouser pattern making and fitting will help you create better-quality trousers for different body shapes and personal styles.
Remember: A successful trouser pattern is not just about measurements—it is about achieving the right balance between fit, comfort, and style.